How to edit email templates
This article explains how to customise the content of the emails that are sent out to customers automatically from the system.
It's possible to customise a template and have it apply to all of your clubs or you can choose to customise the templates for all clubs at a location or at specific clubs.
Firstly, you'll need to head to the Administration section and you'll see the new Email Templates menu item along the side.
This view shows you all the email templates that are available to edit. Where the template is the default template (i.e. you haven't customised it), you'll see a label 'default' in white text on a grey background.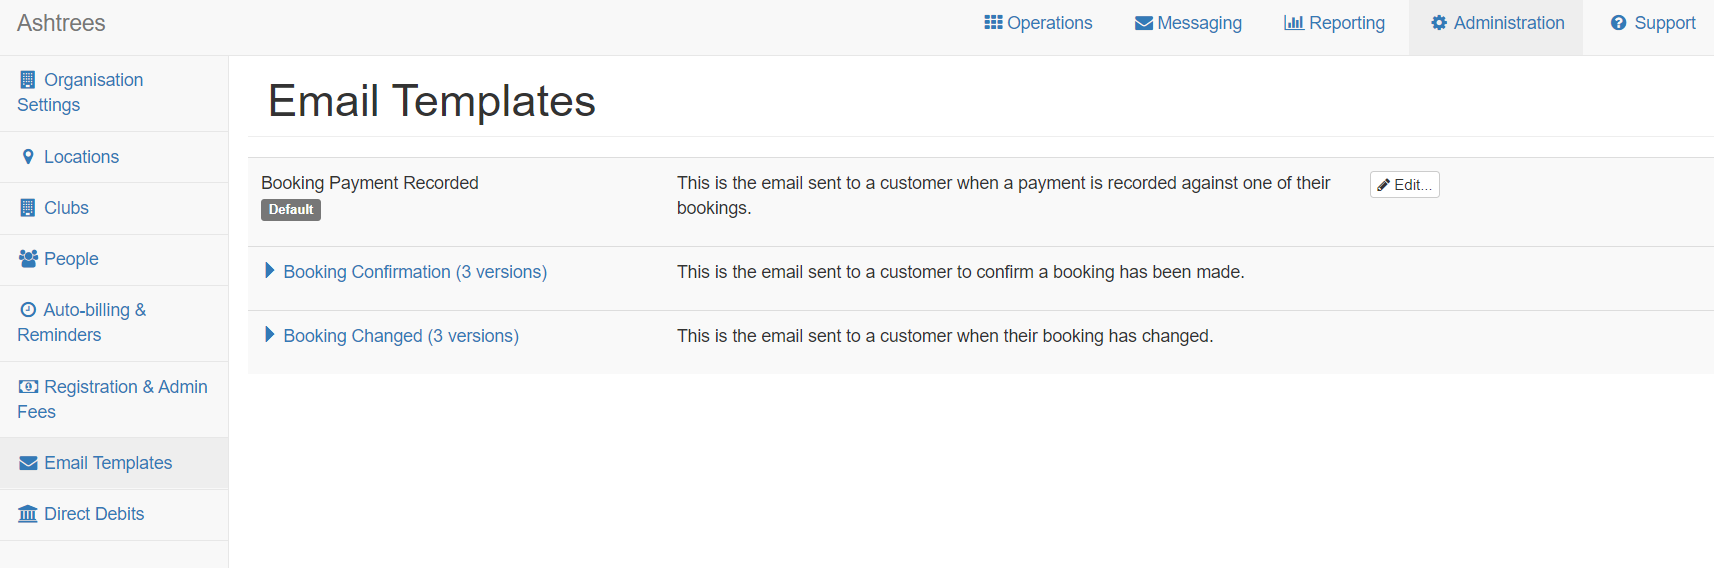
The email templates are grouped by the type of email with a description of what the template is for. In some cases there are more than one 'sub' templates which are for different scenarios. You can view the sub-templates by clicking on the arrow to expand the selection.
For example, The 'Booking Confirmation' template is used to send an email to the customer when a booking is created:
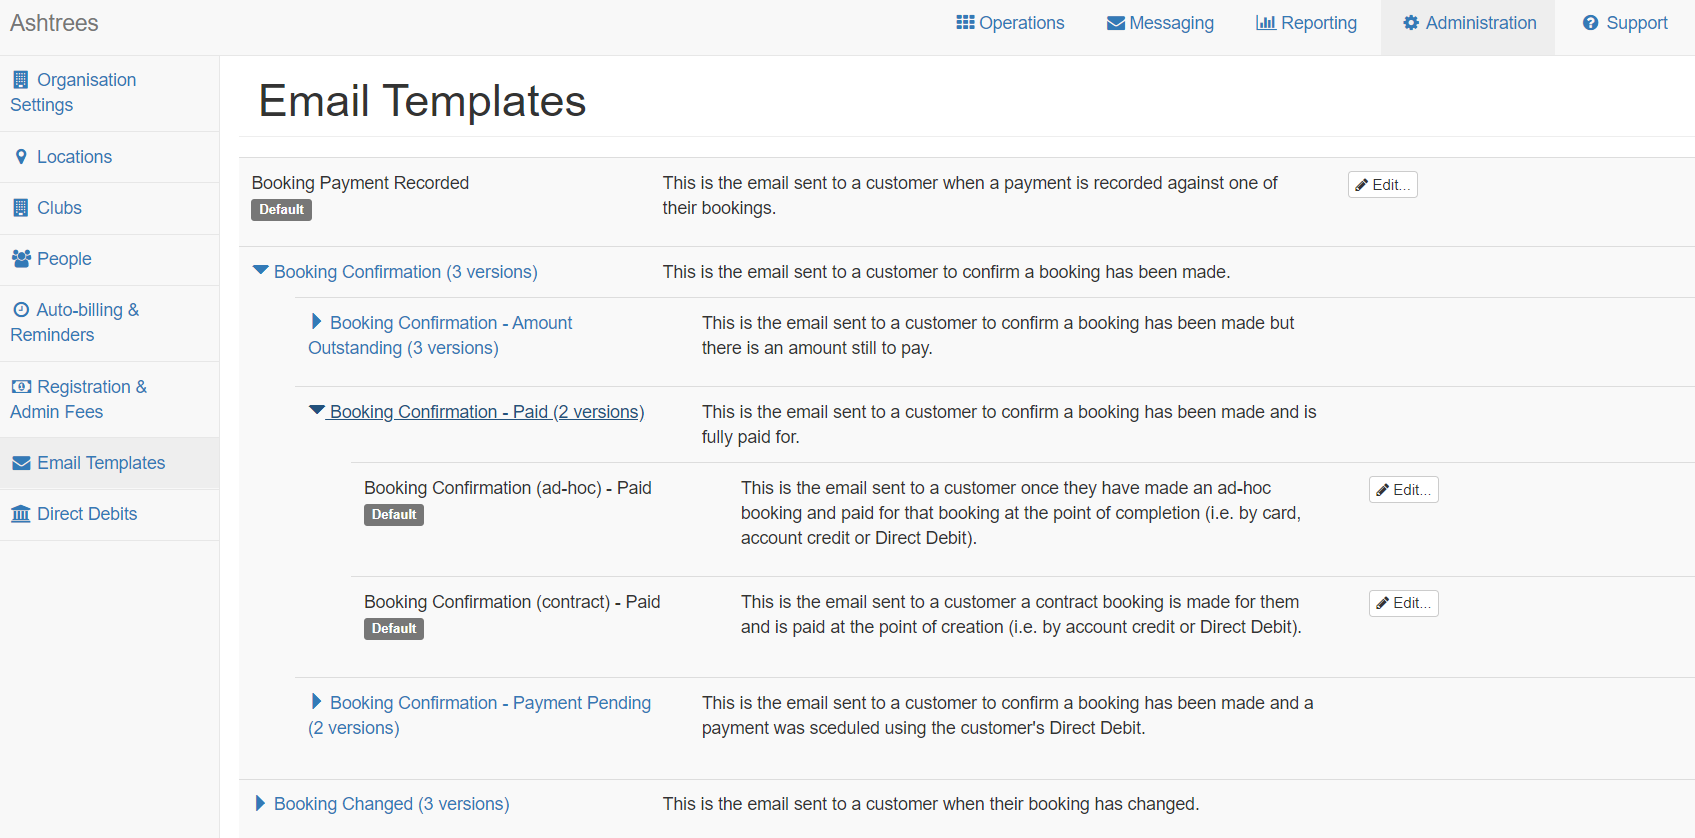
There are different scenarios for this template as follows:
- Amount Outstanding: the booking has an amount still to be paid
- Paid: the booking is fully paid for
- Payment Pending: a payment for the booking is scheduled but not yet received (this is for Direct Debit payments if you have then enabled in your system)
You'll notice that there are also different email templates for ad-hoc bookings and contract bookings (if you have clubs that support contracts).
If in doubt, the short description next to each template confirms what the email is and when it's sent out to the customer.
Templates specific to locations and clubs
It's possible to create custom templates at different levels within the system, i.e.:
- Organisation level: will apply to all clubs unless overridden at the location or club level
- Location level: will apply to all clubs at that location unless overridden for a club (see later section Editing email templates for specific locations)
- Club level: will apply just for that club (see later section Editing email templates for a club)
In the main Email Templates view in the Administration section of the system, where a template is overridden further down the hierarchy, a link is shown underneath the template name labelled Show custom template(s):
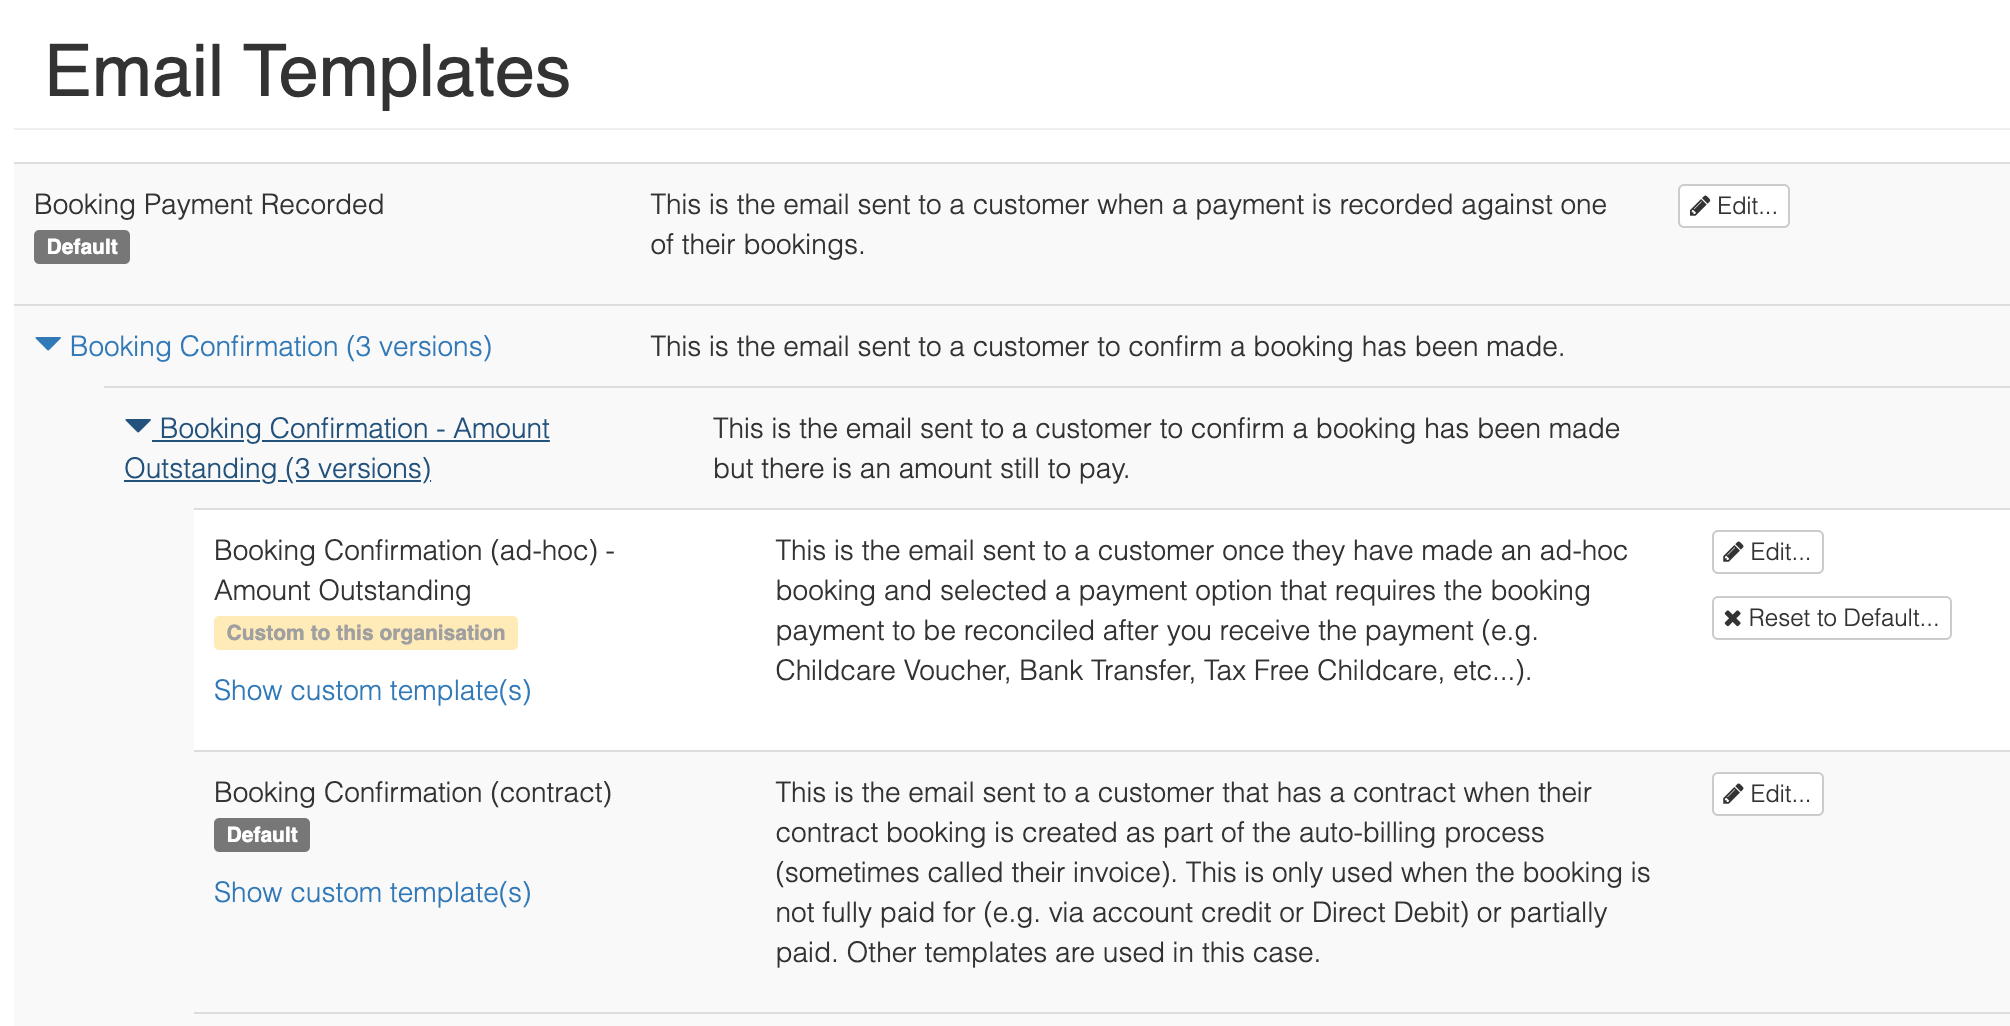
Clicking on Show custom template(s) will show a list of where the template is overridden underneath the description for the template underneath a Custom Templates header:

From here, you can click the 'View in ...' button to be taken to where this template is overridden.
Creating/editing a custom template
When you've located the email you'd like to edit, you should select the edit button and a pop-up will appear allowing you to make changes.
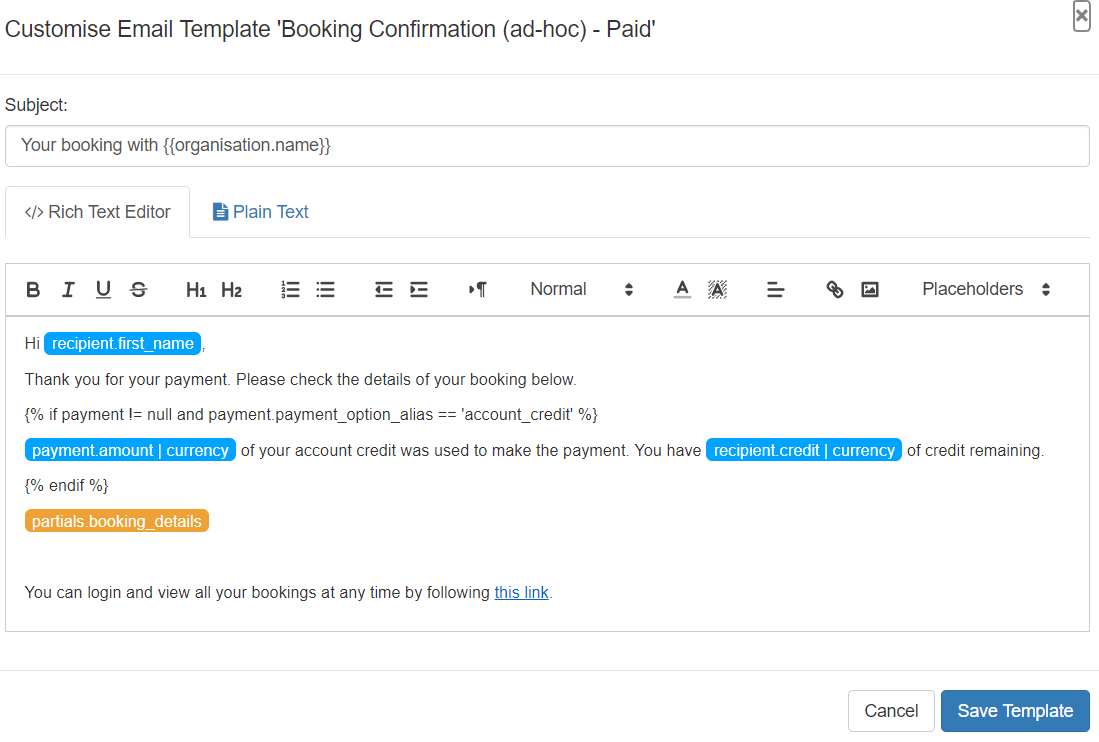
The first thing you'll notice is the subject, this can be changed but please note that anything in curly brackets (e.g. {{ placeholder }}) is a placeholder that will be replaced with a real value when the email is sent. These placeholders must either stay whole, from the starting '{{' to the ending '}}', or be removed completely. If you partially delete a placeholder, this will cause the placeholder to not be replaced with a real value and it will remain in the subject as is.
In the body of the email, the placeholders are treated as block and are are highlighted in blue - these are all general placeholders which will be filled out to suit the customer when the email is sent. If you need to remove one, these can be removed by simply clicking in the body of text and deleting them.

To insert a new placeholder, place the cursor where you would like it to go in the email body then click the Placeholders drop down option (shown in the screenshot above) and you'll see a list appear of the available placeholders. Select the one you need, and it'll appear in the body of text.
Anything highlighted in orange is a system placeholder and will always begin with the word "partials". These are more complex placeholders that will be replaced with blocks of text when the email is sent, for example the table showing the booked sessions is shown as partials.booking_details in the screen shot above.
You may also notice that some templates have 'control blocks' in them like this:
{% if payment != null and payment.payment_option_alias == 'account_credit' %}
    ...
{% endif %}
These are conditional blocks where you can place custom text within the {% if ... %} {% else %} and {% endif %} if you need to but please do not remove any part of the instructions themselves - these are the bits that start with {% and end with %}.
Once you've made any edits to the text, you can save the customised template.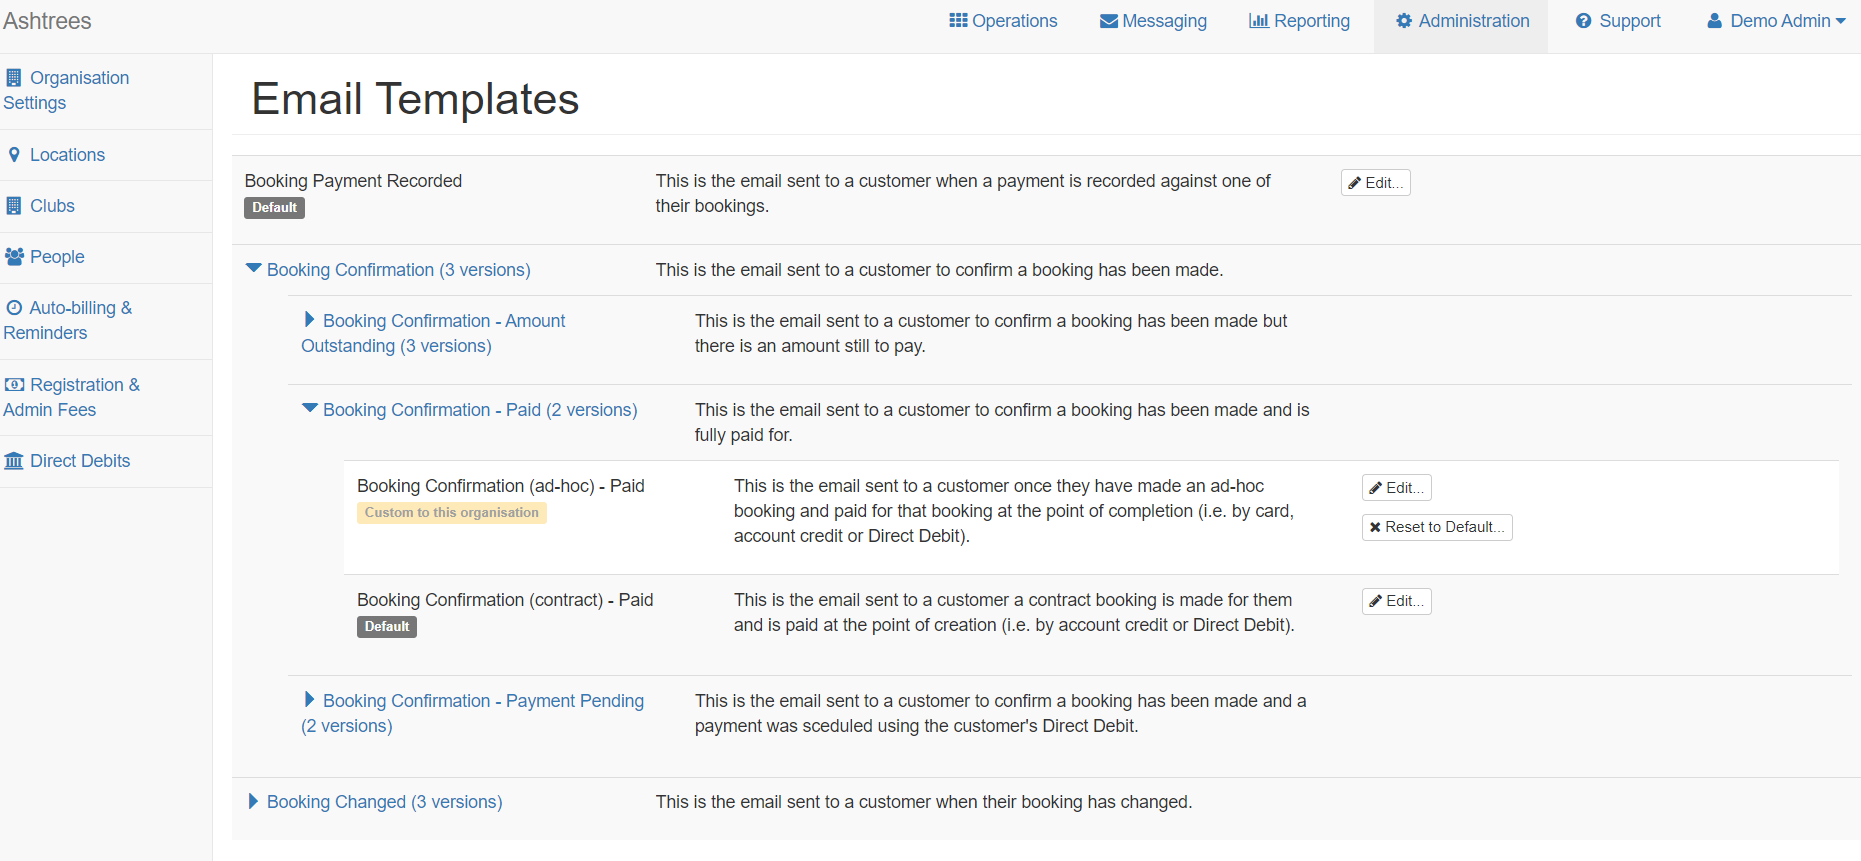
At this point the template has now been saved and you'll be able to spot the difference between an edited template and a default template. The edited templates are highlighted with a white background and will have an orange label confirming them as a custom template.
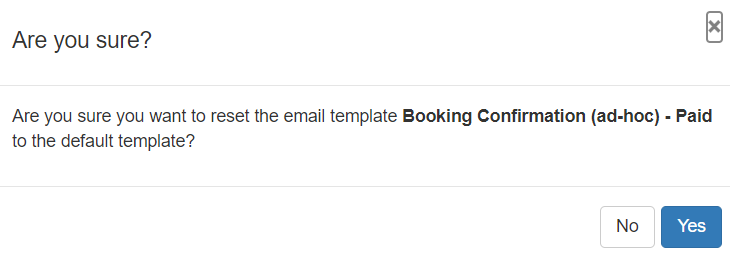
Reset a template to use the default content
Should you have made changes to a template and wish to reset them to default, select the "Reset to default" button and a pop-up will appear asking you confirm if you'd like to make this change.
You can make changes to a custom template by clicking the edit button and the pop-up will appear allow you to make the relevant changes.
Editing email templates for specific locations
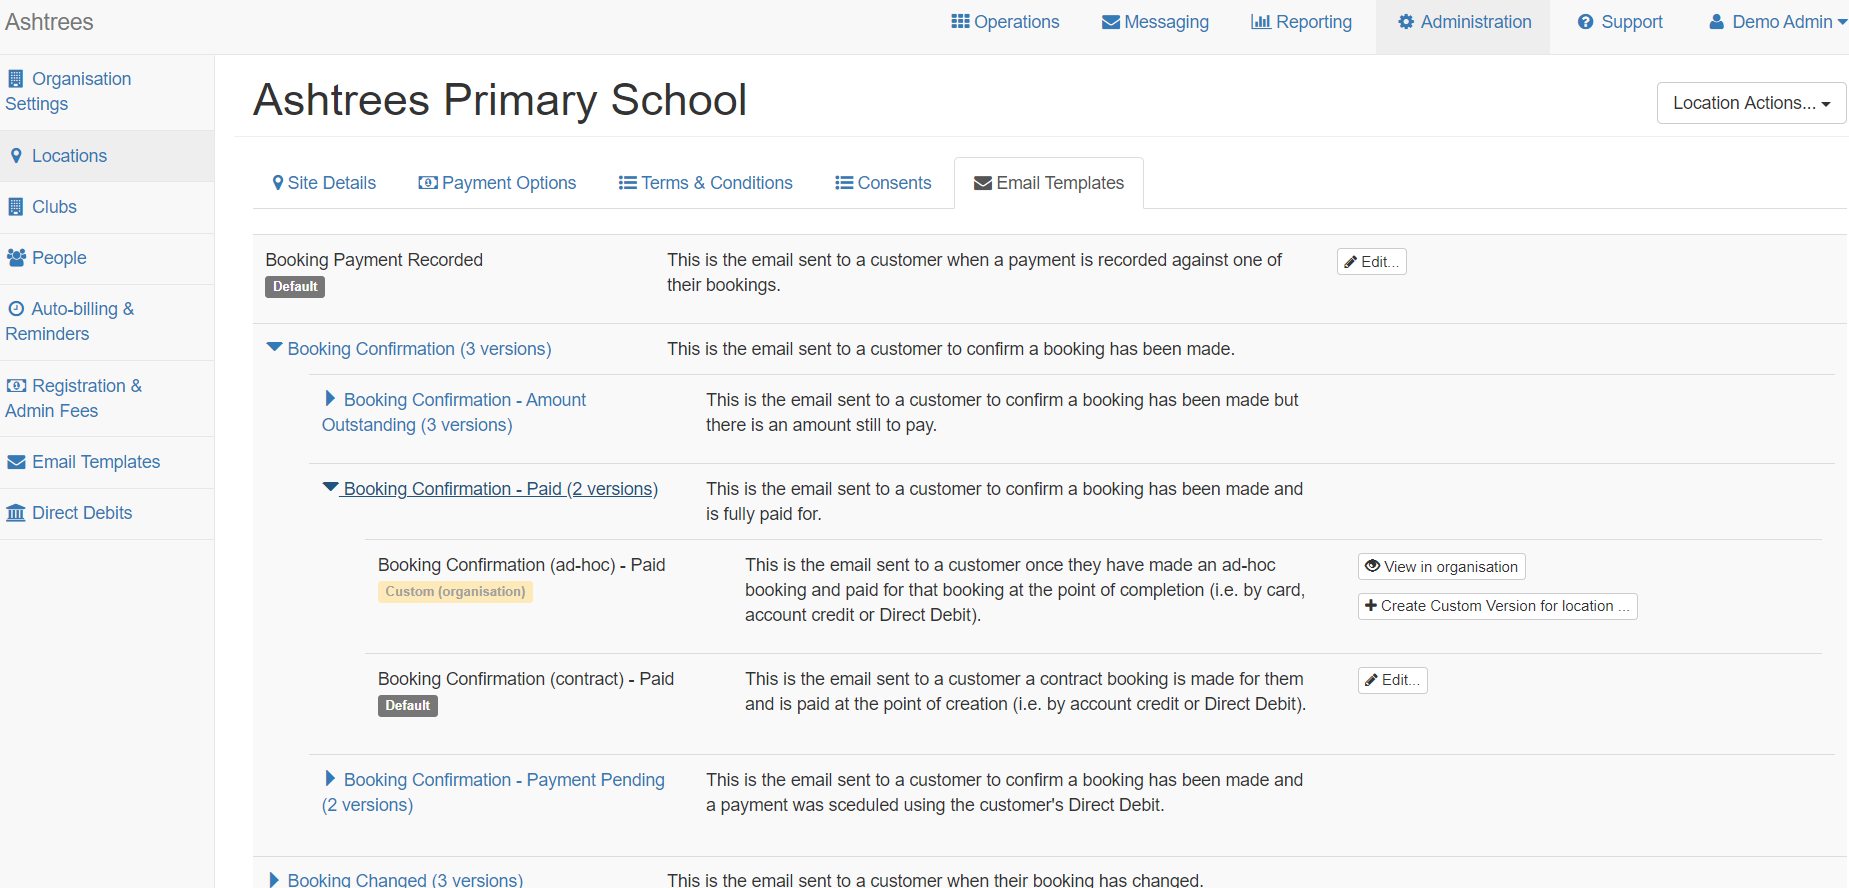
If you need to customise an email template for all clubs at a particular location, head to the Locations tab in the administration view. Locate the location which you'd like to edit the email templates for and view it.
Click the Email Templates tab and here you'll again find all the email templates in the groups. You'll note that any templates edited at organisation level are labelled as 'Custom (organisation)' with an orange background. If you would like to view that template, you can click the View in organisation button to take you there.
If you'd like to create custom version of that template for the location, click the Create Custom Version for Location button which will allow you to make the changes you require and save them as a custom version.
Editing email templates for a club
If you need to customise an email template for a specific club, head to the Clubs tab in the administration view. Locate the club which you'd like to edit the email templates for and view it.
Click the Email Templates tab and here you'll again find all the email templates in the groups. You'll note that any templates edited at organisation or location level are labelled as 'Custom (organisation)' or 'Custom (location)' with an orange background. If you would like to view that template, you can click the View in organisation or View in location button to take you there.
If you'd like to create custom version of that template for the club, click the Create Custom Version for Club button which will allow you to make the changes you require and save them as a custom version.
