How to create a contract for a customer
Sometimes you might need to create a contract for a customer. This article will talk you through step by step on how to do that. The first step is to log into your dashboard, and select the contracts tab in the sidebar.
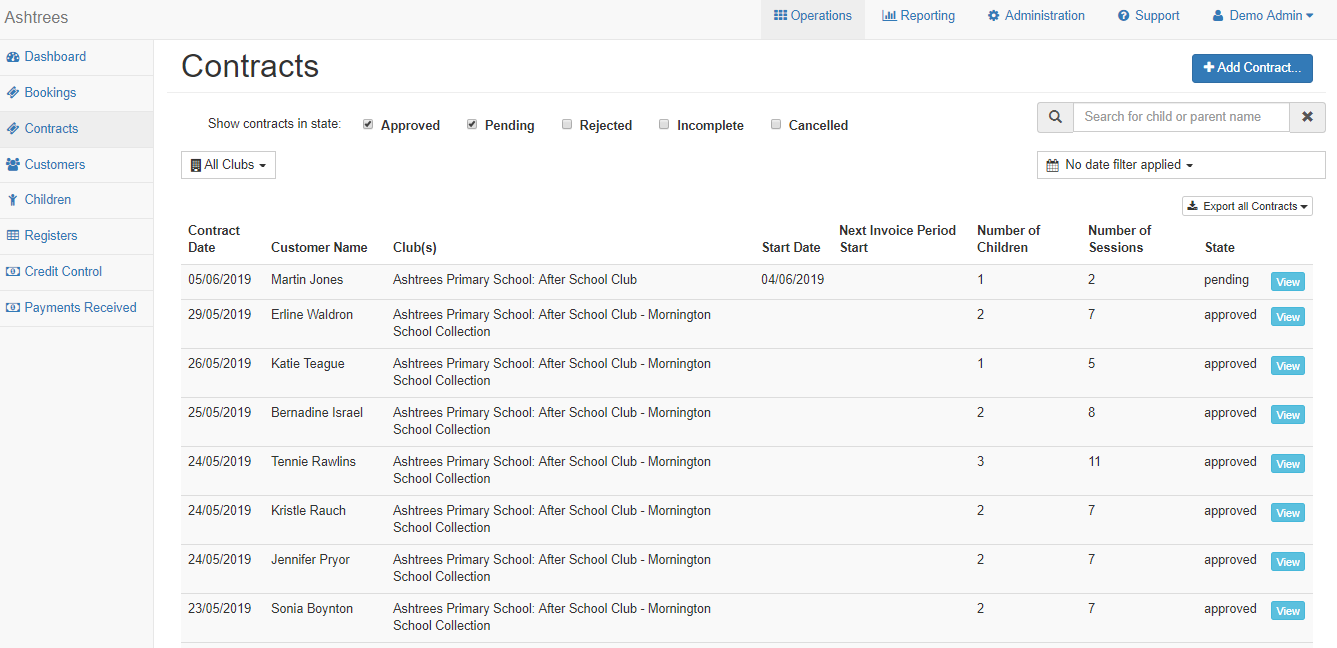
Select the blue +Add Contract button in the right hand corner of the page. A pop up will then appear asking you to confirm the customer you'd like to create the contract for.
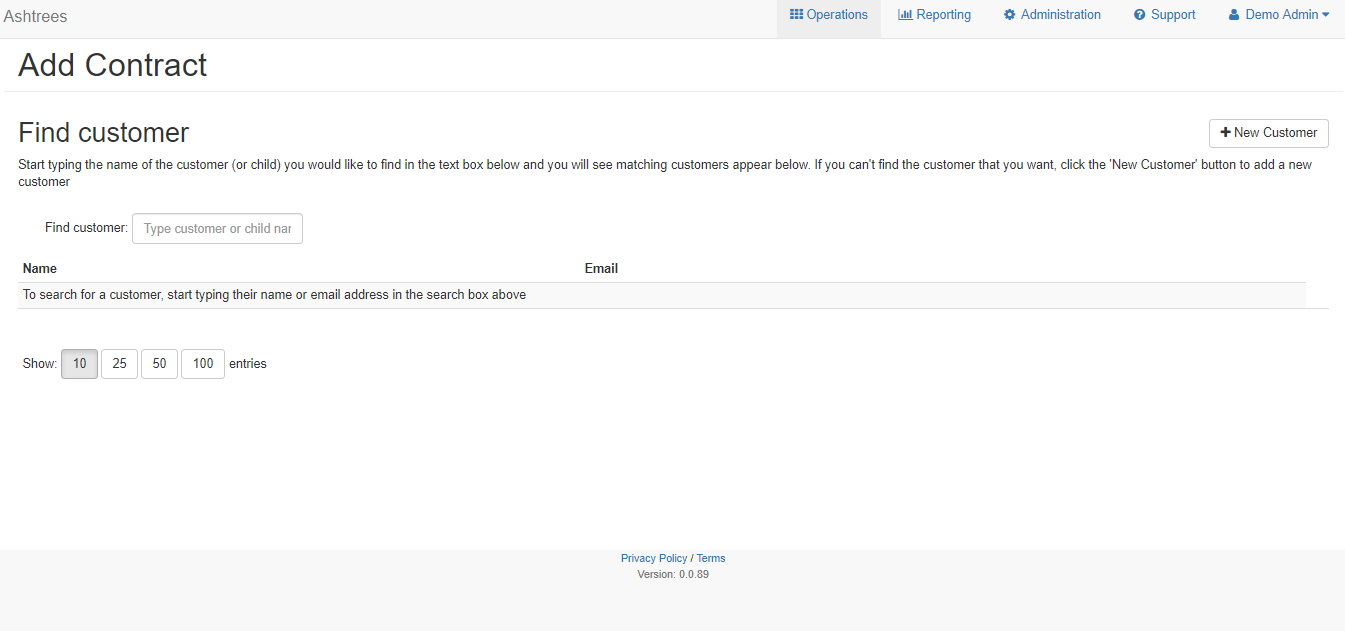
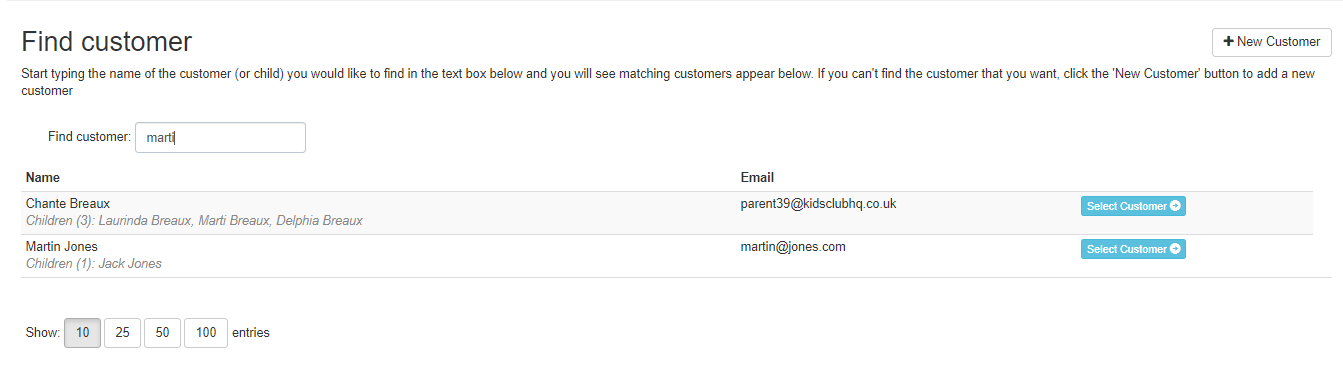
You can enter the name of the customer in the search box and locate the customer the contract needs creating for. When you've found the customer, hit the blue Select Customer button.
If this customer is a new customer, you can select the +New Customer button in the right corner to add a new customer. When you select this a pop up will appear.
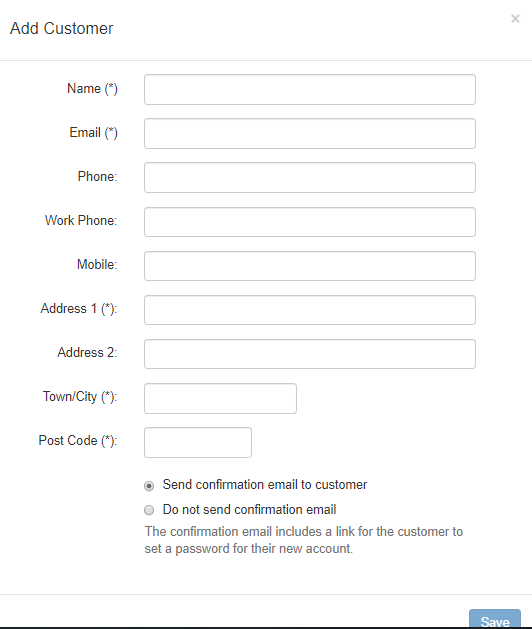
Enter all the information in this pop up and then once completed hit the blue Save button. Once saved, you'll be taken back to the previous screen to find this customer. Once you've located the customer and hit the blue Select Customer button.
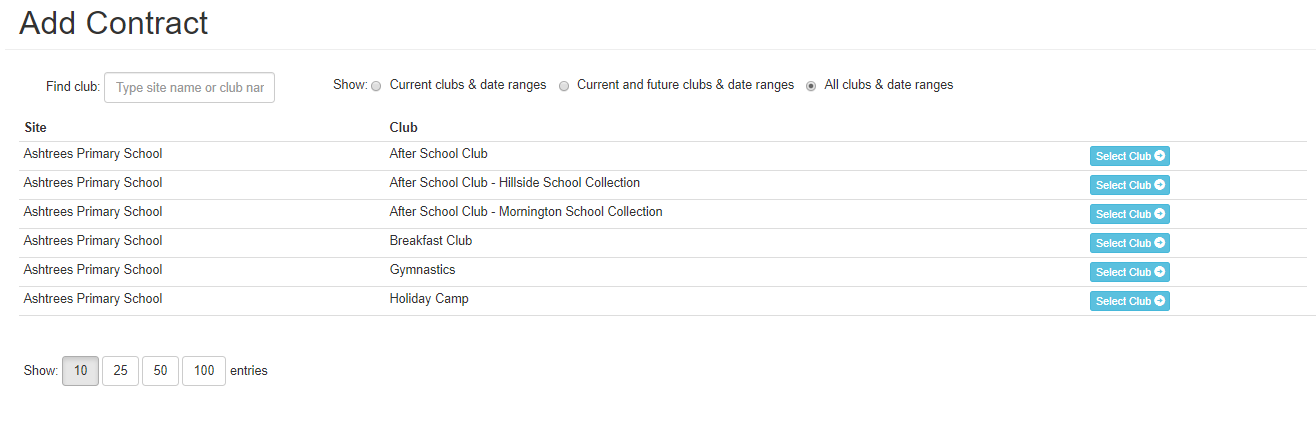
On the next page you'll be prompted to select the club which the contract will apply for. You can type the name of the club in the search bar, or you can use the 3 tick boxes along the top to view current clubs/date ranges, current/future clubs and date ranges or all clubs.
Once you've found the club you want the contract to apply for, hit the blue Select Club button.
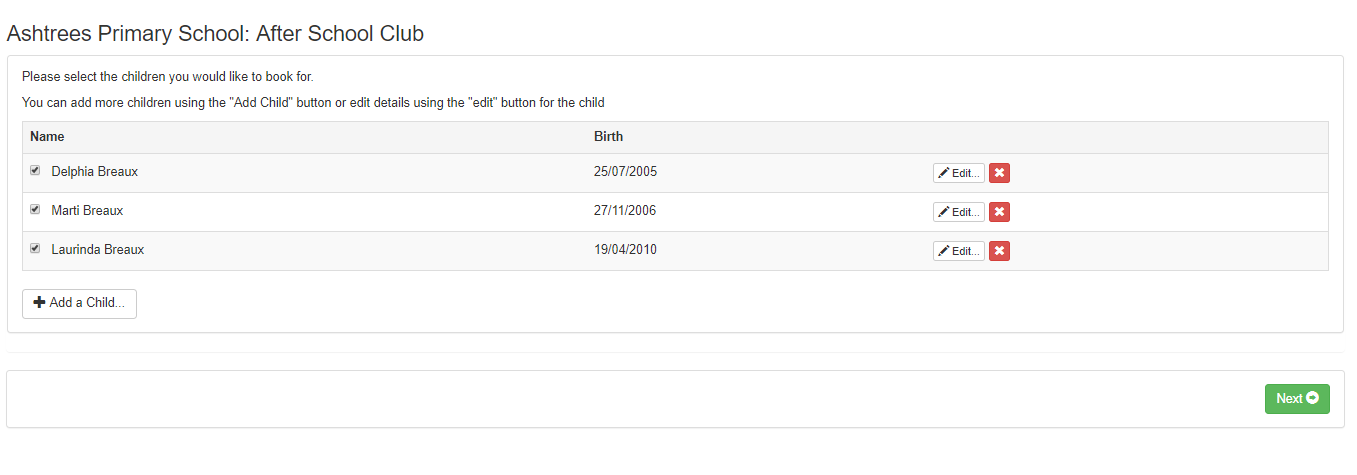
On the next page you'll be prompted to select the children the contract should apply for. Using the tick boxes along the left to select which children.
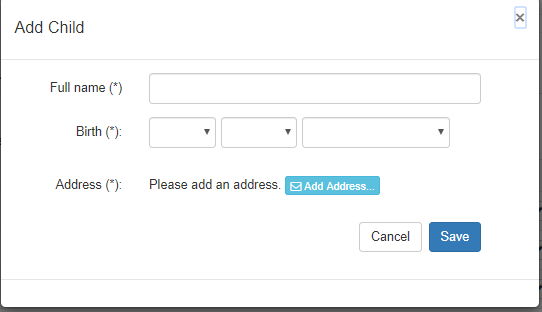
Should you need to add a child for any reason at this stage you can use the +Add a Child button. A pop up will appear asking for some details for the new child and you can then save.
You can also edit any of the information for each child using the Edit button next to each child. Once you've added all the children you'd like to create the contract for, hit the green Next button.
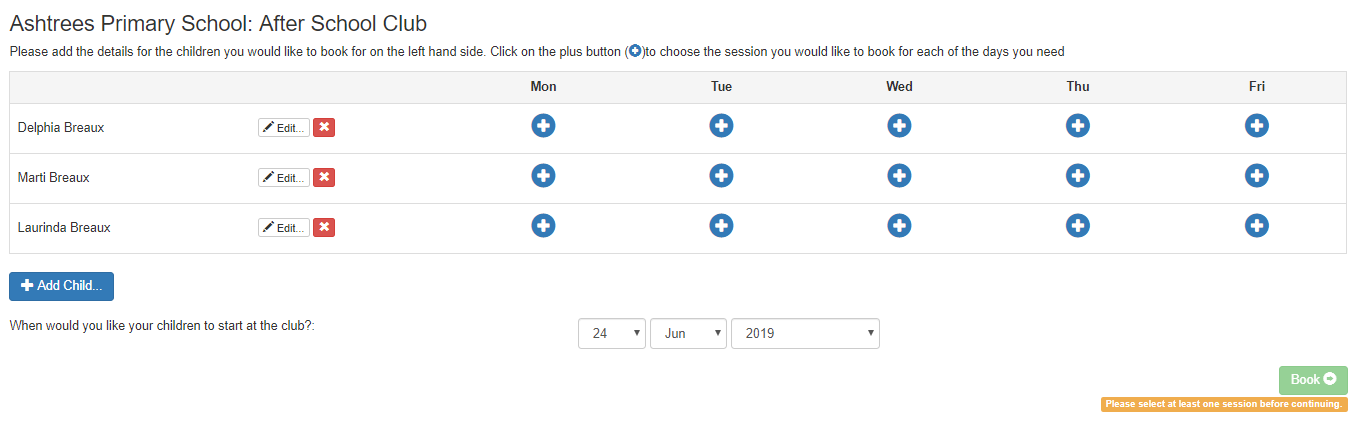
On the next page you'll be asking to confirm the days/sessions for each child in the contract. You'll need to hit the blue + button on each day you'd like to be applied to the contract.

A pop up will appear once you've hit the + button on one of the days you'd like in the contract, the pop up will ask you to confirm which session you'd like to add to the contract and it will enable you to apply this session to all of the children (if there are more than one child in the contract).
Do this for each day and then you'll need to confirm which date you'd like the contract to start on.
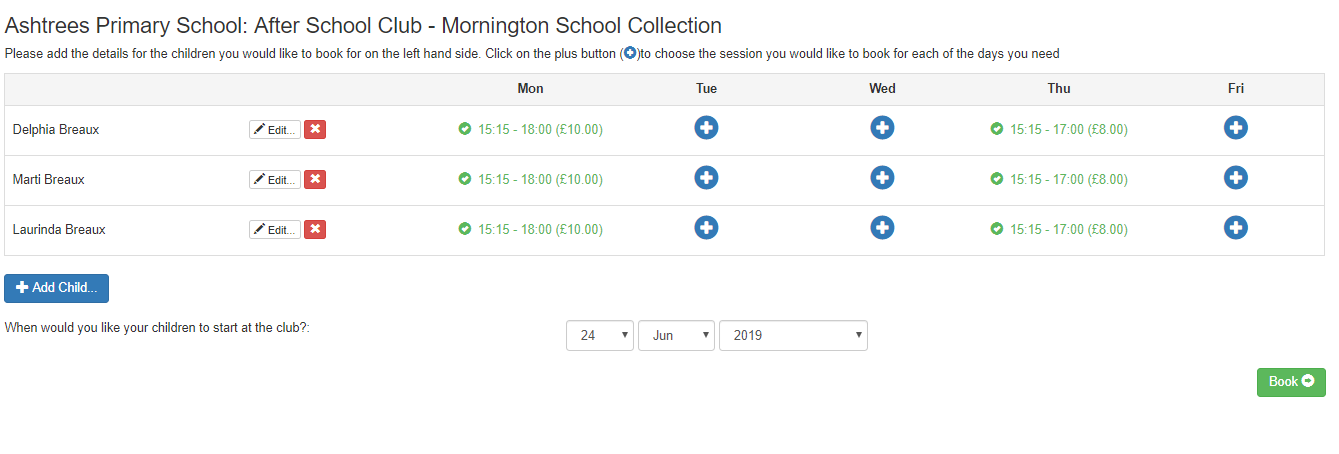
Once you've confirmed the start date for the contract, check that you've confirmed the correct sessions and then you can hit the green Book button.
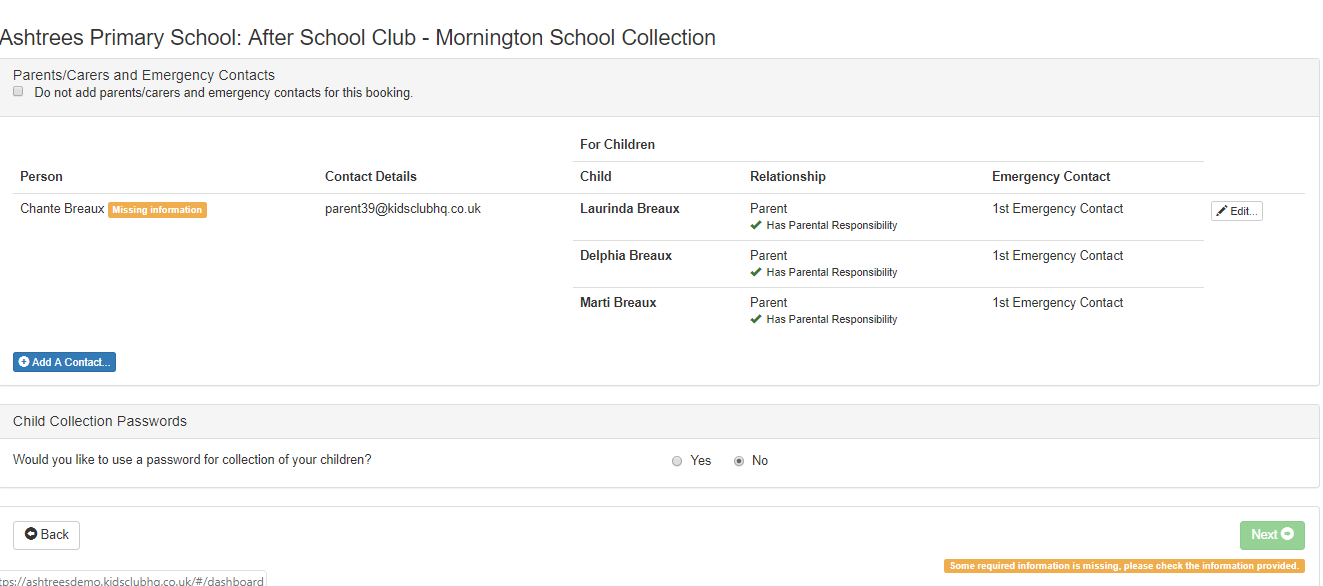
On the next page you'll be prompted to check the Parents/Carers and Emergency Contact details. You can select the button underneath should for any reason you not need those details for this contract.
(You can use the white Edit button on this page to edit any of the parents information, and you can use the blue Add a Contact button to add a new one to this contract)
The final step on this page is to confirm whether a child collection password is required. Once confirmed hit the green Next button.

Here you'll need to check the medical information available for each child. Again, you can select the tick box if you do not require any medical conditions for this booking.
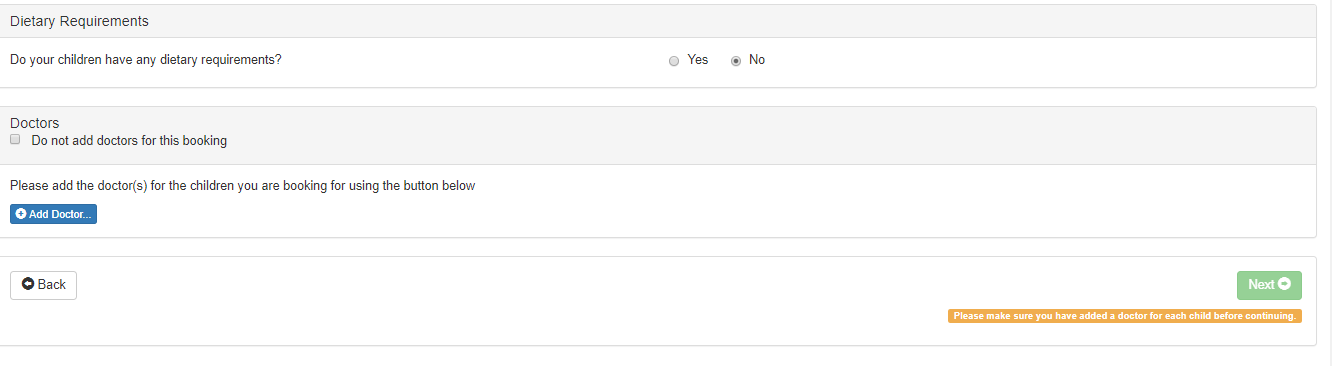
You'll also be questioned about any dietary requirements for children within the contract and then you can check over the doctors information available for the child (again you can select the tickbox should you not require any doctors details for the booking).
When the information on this page has been checked over you can use the green Next button to proceed to the next screen.
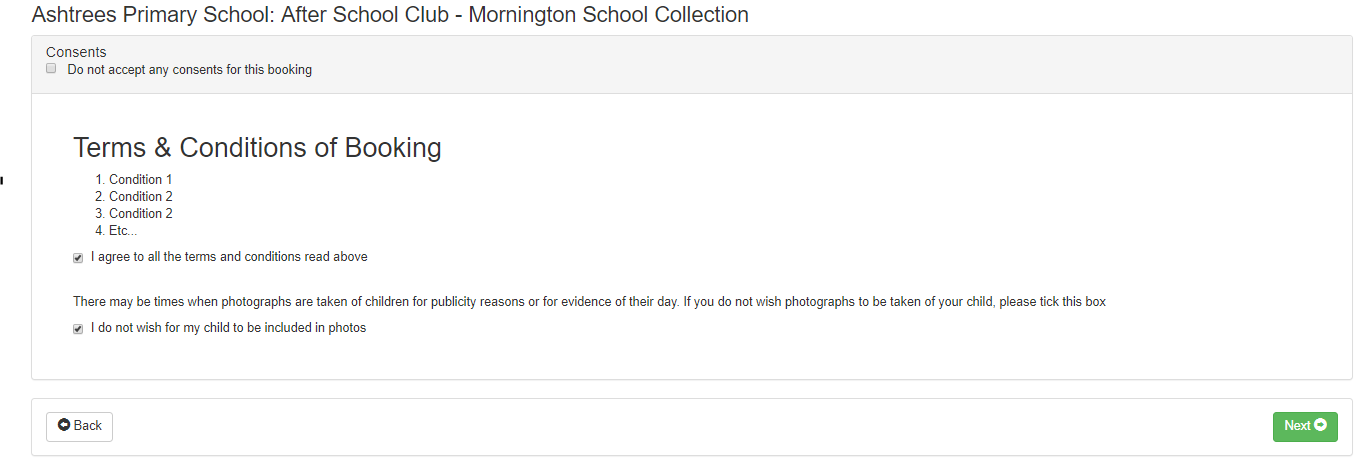
The next page will ask you to confirm to the terms and conditions/consents related to the contract. If you'd like to skip this section right now, hit the tick box for Do not accept any consents for this booking. As confirmed in the message below, you will need to ensure the customer accepts the terms and conditions before they attend.

Hit the green Next button.
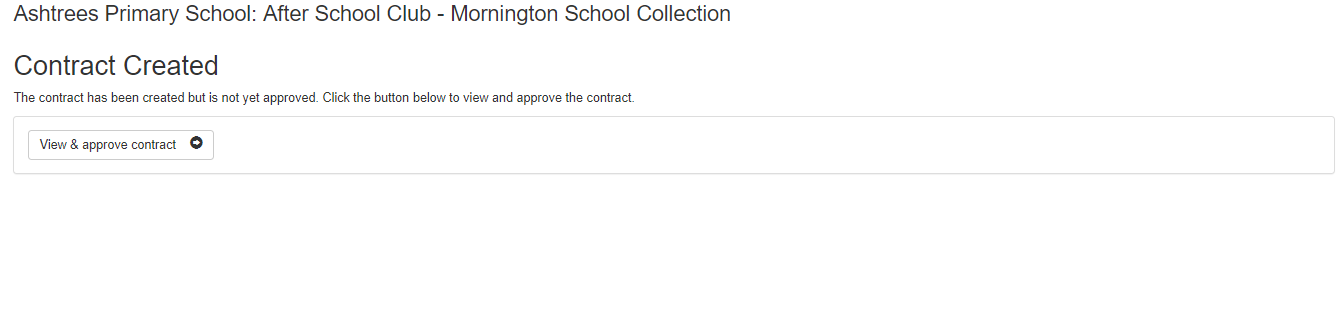
The contract requested is then created. If you wish you can approve the contract on this page. To do this, select the button View & approve contract.
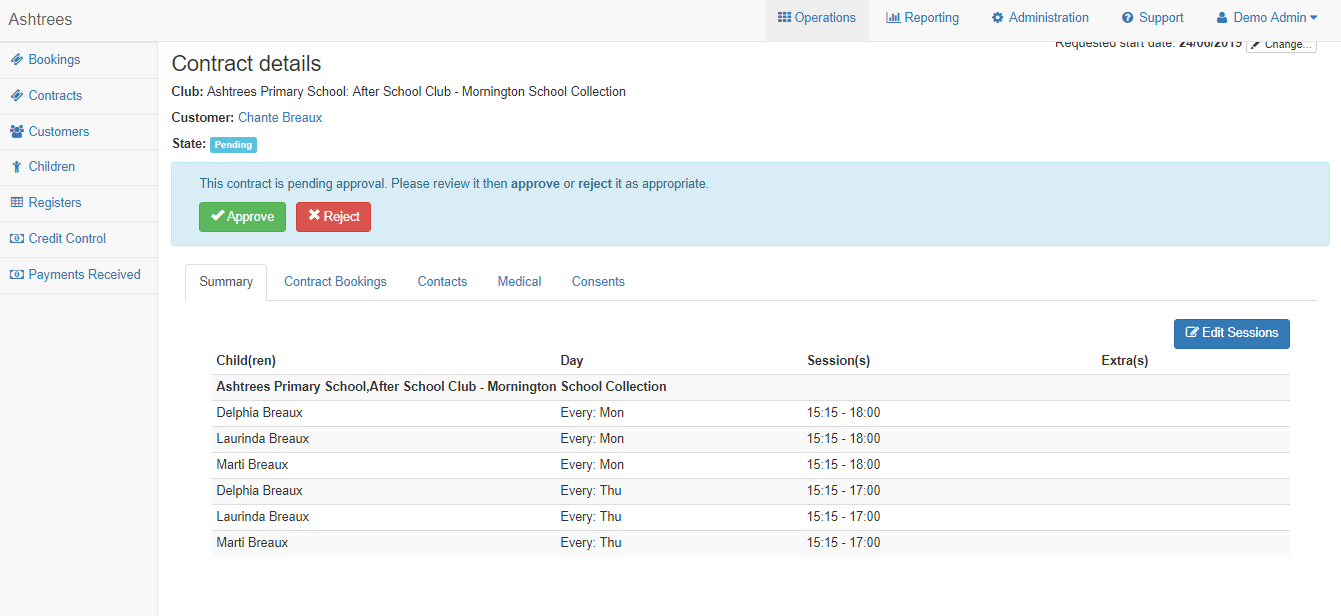
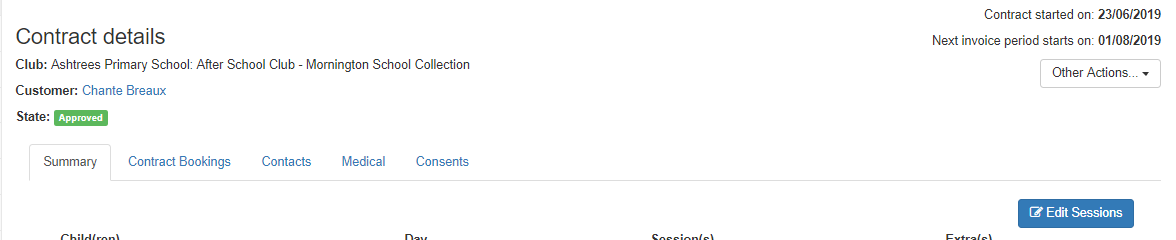
You'll then be taken to a screen to view the contract details. In here you can check the children in the contract and the dates/sessions. To approve this contract hit the green Approve button.
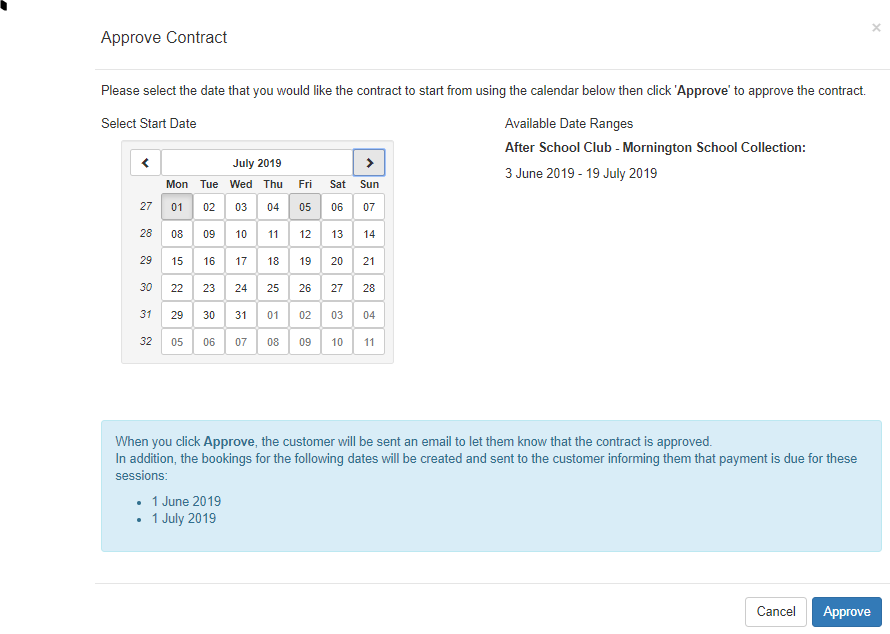
This pop up will appear asking you to confirm the start date for the contract. Locate/select the date you would like the contract to start on and then select the blue Approve button. You'll then be taken back to the previous screen but you'll notice the status of the contract will have changed to approved.